Scanning
From Molecular Modeling Wiki
(Difference between revisions)
(→Using) |
(→Using) |
||
| (14 intermediate revisions not shown) | |||
| Line 1: | Line 1: | ||
== General == | == General == | ||
| - | There | + | There are two network scanners available for general use. |
| + | |||
| + | == HP OfficeJet 8500 == | ||
| + | |||
| + | The first scanner is a part of HP OfficeJet 8500 multifunction printer so it is good enough to scan common documents and images, which need to be converted to an electronic form (for, for example, an e-mail delivery). | ||
[[Image:HPOJ8500.jpg|frameless|300px]] | [[Image:HPOJ8500.jpg|frameless|300px]] | ||
| Line 7: | Line 11: | ||
The device can be found by the Jiri Polach's desk and can be used without any extra permissions. | The device can be found by the Jiri Polach's desk and can be used without any extra permissions. | ||
| - | == Using == | + | === Using === |
To scan you document | To scan you document | ||
| - | # Open the scanner lid and place your document on the scanner glass.<br>''' | + | # Open the scanner lid and place your document on the scanner glass.<br>'''or'''<br>Insert you multipage document in the automatic feeder on top of the device. See pictograms on the feeder to orient printed side properly. |
| - | # Touch the device screen and wake | + | # Touch the device screen and wake the device up if the screen is blank. |
# Touch the ''Scan'' icon, the select ''Network Folder'' and ''COMMON on CLARA''. | # Touch the ''Scan'' icon, the select ''Network Folder'' and ''COMMON on CLARA''. | ||
| - | # If necessary, change the scanner settings | + | # If necessary, change the scanner settings; however, as the default is configured to scan a common document with good quality and save if to a PDF file, there will usually be no changes necessary. |
| - | # Grab your document and return to your PC. Open file explorer, browse to <pre>\\CLARA\COMMON\SCANNER\DATA</pre> and find your document. Copy it and delete from ''clara''. | + | # Grab your document and return to your PC. Open file explorer, browse to <pre>\\CLARA\COMMON\SCANNER\DATA</pre> and find your document. Copy it and delete from '''clara'''. |
By adjusting the settings you can change the resolution, darkness and the output file format to one of PDF, JPG, and TIFF. | By adjusting the settings you can change the resolution, darkness and the output file format to one of PDF, JPG, and TIFF. | ||
| + | |||
| + | == Minolta bizhub C220 == | ||
| + | |||
| + | The second scanner is a part of multifunction Minolta bizhub C220 device and has similar use as the HP scanner above. | ||
| + | |||
| + | <br>[[Image:bizhubc220.jpg|frameless|300px]]<br><br> | ||
| + | |||
| + | The device is located by the entrance to our offices. | ||
| + | |||
| + | === Using === | ||
| + | |||
| + | # Open the scanner lid and place your document on the scanner glass.<br>'''or'''<br>Insert you multipage document in the automatic feeder on top of the device. See pictograms on the feeder to orient printed side properly. | ||
| + | # Press ''Fax / Scan'' button. Touch ''SCANNER on CLARA'' soft button on the touchscreen. | ||
| + | # If necessary, change the scanner settings; however, as the default is configured to scan a common document with good quality and save if to a PDF file, there will usually be no changes necessary. | ||
| + | # Press ''Start''. | ||
| + | # Grab your document and return to your PC. Open file explorer, browse to <pre>\\CLARA\COMMON\SCANNER\DATA</pre> and find your document. Copy it and delete from '''clara'''. | ||
| + | |||
| + | |||
| + | [[Category:LAN]] | ||
Latest revision as of 14:11, 13 December 2011
Contents |
General
There are two network scanners available for general use.
HP OfficeJet 8500
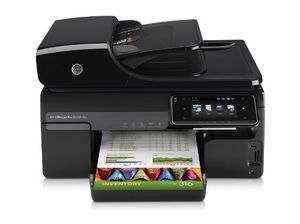
The first scanner is a part of HP OfficeJet 8500 multifunction printer so it is good enough to scan common documents and images, which need to be converted to an electronic form (for, for example, an e-mail delivery).
The device can be found by the Jiri Polach's desk and can be used without any extra permissions.
Using
To scan you document
- Open the scanner lid and place your document on the scanner glass.
or
Insert you multipage document in the automatic feeder on top of the device. See pictograms on the feeder to orient printed side properly. - Touch the device screen and wake the device up if the screen is blank.
- Touch the Scan icon, the select Network Folder and COMMON on CLARA.
- If necessary, change the scanner settings; however, as the default is configured to scan a common document with good quality and save if to a PDF file, there will usually be no changes necessary.
- Grab your document and return to your PC. Open file explorer, browse to
\\CLARA\COMMON\SCANNER\DATA
and find your document. Copy it and delete from clara.
By adjusting the settings you can change the resolution, darkness and the output file format to one of PDF, JPG, and TIFF.
Minolta bizhub C220
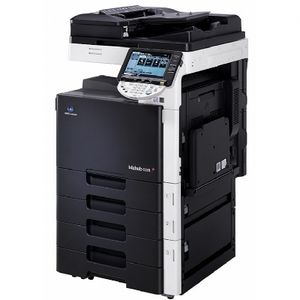
The second scanner is a part of multifunction Minolta bizhub C220 device and has similar use as the HP scanner above.
The device is located by the entrance to our offices.
Using
- Open the scanner lid and place your document on the scanner glass.
or
Insert you multipage document in the automatic feeder on top of the device. See pictograms on the feeder to orient printed side properly. - Press Fax / Scan button. Touch SCANNER on CLARA soft button on the touchscreen.
- If necessary, change the scanner settings; however, as the default is configured to scan a common document with good quality and save if to a PDF file, there will usually be no changes necessary.
- Press Start.
- Grab your document and return to your PC. Open file explorer, browse to
\\CLARA\COMMON\SCANNER\DATA
and find your document. Copy it and delete from clara.

