Printing
From Molecular Modeling Wiki
Contents |
General
All users connected to the local network can use all common printers (see the table of printers below). All standard printers (all HP LaserJet) are connected to the clara server and printing is only possible through this server. The big multifunction printer/scanner/copier Minolta bizhub C220 is connected to the clara server too, but print jobs can also be sent directly to the printer.
| It is not possible to print directly to any of the standard printers (all HP LaserJet) although they are connected to the local network! Printer configuration on your computer must be always set to send all jobs to clara - jobs sent directly to printers will never be processed. |
Standard printers
Use the following instructions to install printing on any of the standard printers (all Hewlett-Packard LaserJet printers). To set up printing on the multifunction printer Minolta bizhub C220 see below.
Linux
It is usually not necessary to install or configure printers under Linux. You must have CUPS software package installed to be able to print, but it is automatically installed and configured when installing most of the modern Linux distributions.
To check / modify printing setup and to see if all network printers are visible on your system, use Printer Control Panel, System Configuration or whichever utility / configuration application you distribution offers. All printers should appear as network printers on clara server with queue names as listed in the table below.
| Note: | From time to time, there may appear the same printers in the list of available printers, which look like they were connected to other computers in the local network - do not pay attention to these, as they are only re-exported printers connected to clara. Users who re-exported the printers should repair their configuration as soon as possible, so ask them to do so or inform the administrator. |
Windows
Installing
For some reason, the best installation practice to install a network printer on Windows (at least since Windows XP) operating system is to use the following trick: do not install these printers as network printers, install them as local printers instead. To do so, follow these instructions (for Windows XP; modify as needed for Windows Vista or Windows 7):
- Open Control Pannel and select Printers and Faxes.
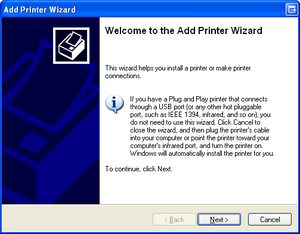
- Select Add a printer - an Add Printer Wizard appears.
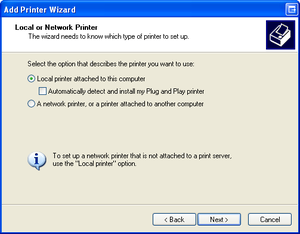
- When asked, select Local printer attached to this computer and deselect Automatically detect and install my Plug and Play printer. Click Next.
- Select Create a new port and choose Local Port in the drop down list.
- When Port Name form appears, enter the port name in the following form
\\CLARA\HPxxxx
replacing xxxx with the queue name according to the table below.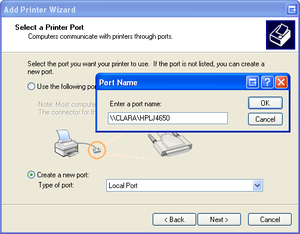
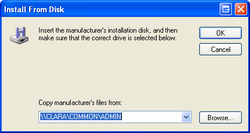
- Select the proper driver in the table that follows or click on Have Disk ...' and browse to
\\CLARA\COMMON\ADMIN\DRIVERS
to find a driver.
- Continue with the wizard and answer the questions that follow (say Do not share this printer when asked).

- To confirm all settings, click Finish.


Configuring
As the printers are connected to the clara server, the client's PC does not get any information about the printer capabilities automatically and must be entered manually. Fortunately, the only parameter that needs to be set this way is the presence of duplex units the printer; on the other hand, if this parameter is not changed, user is not able to print double-sided documents. To change duplex unit setting, follow the instructions:
- Open Control Pannel and select Printers and Faxes.
- Right-click on the selected printer and select Properties. According to the printer type and the driver version the dialog that opens does not need to be exactly same as on the following picture - it should, however, be somehow similar.
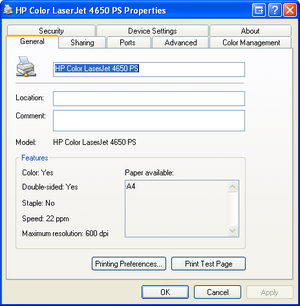
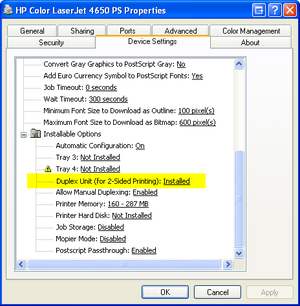
- Select Device Settings tab and find Duplex Unit item. Change the setting to Installed.
- Select the General tab and click on Printing Preferences...
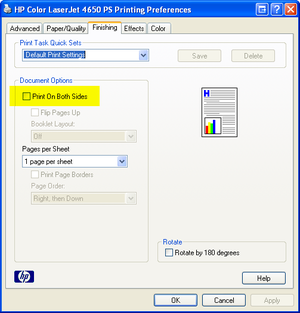
- Select Finishing tab and try to set Print on Both Sides. If you leave it checked here, it will stay as your default. You can always change this setting when printing a document.


Minolta bizhub C220
The print jobs to this printer can be sent either through clara server or directly to the printer. For direct printing setup you may need to have the following information ready:
- printer IP address: 147.231.129.22
- printer model: Minolta bizhub C220
- printer model group: Konica Minolta C360 series
Linux
The easiest Linux printing setup is to print to Minolta bizhub C220 the same way as to other standard printers, i.e. using clara server (see the instructions above).
Direct printing to bizhub C220 is also possible, but requires manual setup and usually needs expert-level experience and deep knowledge of selected Linux distribution. To install direct printing on Linux use an administration utility of your distribution. You may need to supply the PPD file and CUPS filter which can be found in//CLARA/COMMON/ADMIN/DRIVERS/BIZHUB220/LINUX/PPDdirectory or one of the Minolta's PPD files in ZIP packages in
//CLARA/COMMON/ADMIN/DRIVERS/BIZHUB220/ZIPdirectory. The installion will probably differ on different distributions and may require manual editing of CUPS and/or other printing system configuration files.
Windows
Follow the instructions for Windows 7 (Windows XP/Vista method should be similar).
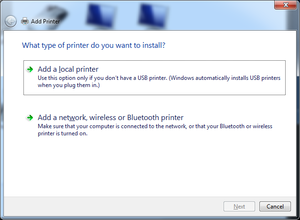
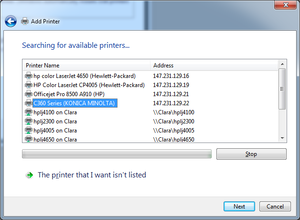
- Click Start and select Devices and Printers. New windows opens. Click on the Add a printer button on the upper horizontal bar.
- Click on Add a network, wireless or Bluetooth printer and wait until the computer finishes searching for network printers (usually less than 1 minute). Select C360 Series (KONICA MINOLTA) item and click Next. If the printer is not found (for example, when the computer is connected via wireless network), enter the printer IP address manually (see above).
- Select Have Disk..., enter the path
\\CLARA\COMMON\ADMIN\DRIVERS\BIZHUB220\WIN64\PS\BHC360PSWinx64_3600EN
for 64-bit Windows English or\\CLARA\COMMON\ADMIN\DRIVERS\BIZHUB220\WIN64\PS\BHC360PSWinx64_3600CS
for 64-bit Windows Czech or\\CLARA\COMMON\ADMIN\DRIVERS\BIZHUB220\WIN32\PS\BHC360PSWinx86_3600EN
for 32-bit Windows English or\\CLARA\COMMON\ADMIN\DRIVERS\BIZHUB220\WIN32\PS\BHC360PSWinx86_3600CS
for 32-bit windows Czech and click OK or click on Browse..., browse to the directory and click Open. Click on Next.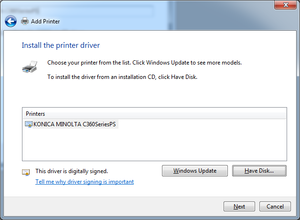
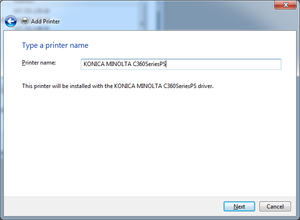
- Edit the printer name or keep the default one and click Next.
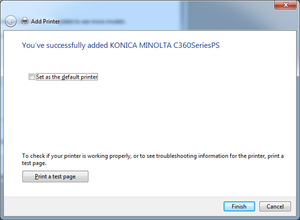
- Select Do not share this printer and click Next, then click Finish.
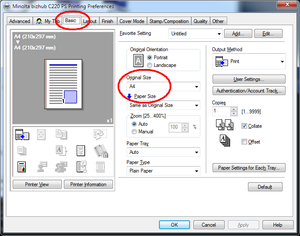
- Important! Click Start and select Devices and Printers. Right-click on the printer and select Printing preferences. Select Basic tab, check if Original size is set to A4 and change the setting if necessary.


Available printers
This is the complete list of available printers.
| Printer | Picture | Type | Duplex | Queue | Location |
|---|---|---|---|---|---|
| HP LaserJet 2300 | 
| laser b&w | yes | HPLJ2300 | server room |
| HP LaserJet 4100 | 
| laser b&w | yes | HPLJ4100 | server room |
| HP Color LaserJet 4650 | 
| laser color | yes | HPLJ4650 | server room |
| HP Color LaserJet 4005 | 
| laser color | yes | HPLJ4005 | entrance |
| Minolta bizhub C220 | 
| laser color | yes | none | entrance |